How To Diy A Long Shag Haircut In Minutes Or Less
Introduction
The shag haircut has been making a comeback in recent years, and for good reason. It's a versatile and flattering haircut that can be styled in a variety of ways. If you're thinking about getting a shag haircut, but don't want to spend a lot of money at the salon, you can easily DIY it at home.
In this blog post, I'll show you how to DIY a long shag haircut in minutes or less. I'll provide step-by-step instructions, as well as tips and tricks to help you get the perfect shag.
Materials
- Hair cutting shears
- Styling comb
- Texturizing spray
- Round brush
- Blow dryer
Instructions
- Wash and condition your hair as usual.
- Blow dry your hair until it's completely dry.
- Gather your hair into a high ponytail.
- Cut the ponytail into three sections.
- Starting with the bottom section, use the thinning shears to remove weight from the hair.
- Cut the hair in a graduated manner, with the layers getting shorter as you move up the head.
- Repeat steps 5-6 for the middle and top sections.
- Release the ponytail and style your hair as desired.
Tips and Tricks
- Use a texturizing spray to add volume and texture to your hair.
- Use a round brush to blow dry your hair in a way that creates lift and movement.
- Don't be afraid to experiment with different styling techniques to find what works best for you.
Conclusion
DIYing a long shag haircut is a great way to save money and get a trendy new hairstyle. With a little practice, you'll be able to create a shag that looks just as good as one you'd get from a salon.
Here are some additional tips for DIYing a long shag haircut:
- If you have fine hair, use a wider-tooth comb to create more lift and volume.
- If you have thick hair, use a thinner-tooth comb to prevent your hair from becoming too layered.
- Start with small sections of hair and work your way up to larger sections as you get more comfortable.
- Be patient and take your time. It's better to take a few extra minutes to get the right haircut than to rush and end up with something you're not happy with.
I hope this blog post has helped you learn how to DIY a long shag haircut in minutes or less. With a little practice, you'll be able to create a shag that looks just as good as one you'd get from a salon.
Are you thinking about giving yourself a long shag haircut? If so, you've come to the right place! We have all the information you need to get the perfect shag, from step-by-step instructions to helpful tips.
Visit Hairstyle Glow Beauty for more information about "long shag haircut diy".
FAQ of long shag haircut diy
Q: What are the benefits of a long shag haircut?
A: A long shag haircut can add volume and texture to your hair, making it look fuller and more voluminous. It can also help to frame your face and create a more youthful look.
Q: What are the steps involved in a long shag haircut DIY?
A: Here are the basic steps involved in a long shag haircut DIY:
- Wash and condition your hair.
- Section your hair into four quadrants.
- Starting at the nape of your neck, cut each section with a point-cutting technique.
- Continue cutting the rest of your hair, working your way up to the top of your head.
- Style your hair as desired.
Q: What are some tips for cutting a long shag haircut?
A: Here are some tips for cutting a long shag haircut:
- Use sharp shears to get clean, precise cuts.
- Point-cut the hair to create layers and texture.
- Overlap the layers slightly to create a more blended look.
- Cut the hair dry to see how it will fall.
- Style the hair as desired.
Q: What are some common mistakes to avoid when cutting a long shag haircut?
A: Here are some common mistakes to avoid when cutting a long shag haircut:
- Cutting the hair too short.
- Creating too much bulk or weight.
- Not overlapping the layers enough.
- Cutting the hair wet, which can make it difficult to see how it will fall.
Q: What are some styling tips for a long shag haircut?
A: Here are some styling tips for a long shag haircut:
- Use texturizing products to add volume and texture.
- Blow-dry your hair with a diffuser to create a more voluminous look.
- Use a flat iron or curling iron to create waves or curls.
- Add a headband or scarf to add a touch of style.
Image of long shag haircut diy
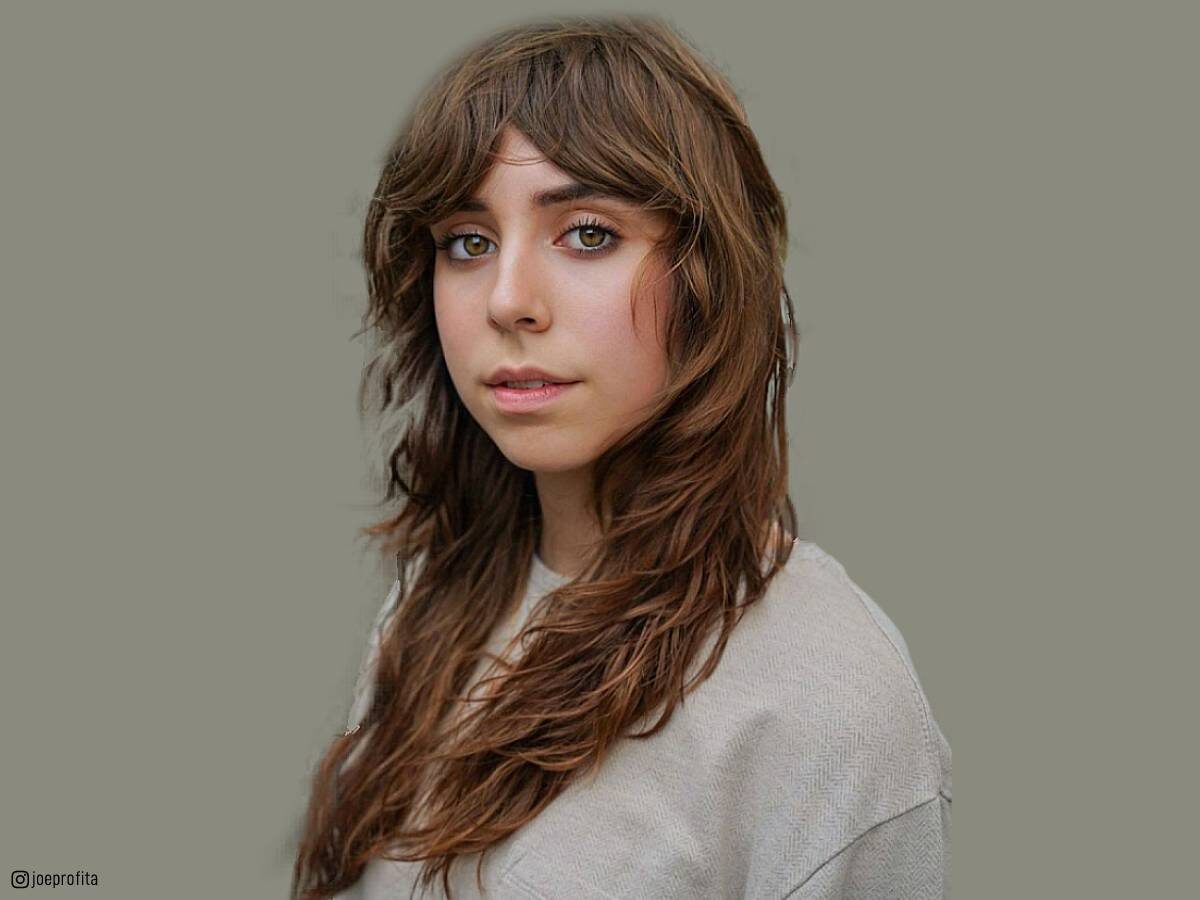
- Long, layered shag with curtain bangs. This is a classic shag haircut that is flattering on all face shapes. The layers add movement and texture to the hair, and the curtain bangs frame the face nicely.
- Wavy shag with blunt bangs. This shag haircut has a more modern feel, with its wavy texture and blunt bangs. The bangs add a touch of edge to the haircut, while the waves give it a more laid-back vibe.

- Messy shag with side-swept bangs. This shag haircut is all about the messy, undone look. The layers are uneven and choppy, and the side-swept bangs add a touch of personality.

- Straight shag with wispy bangs. This shag haircut is sleek and sophisticated. The straight layers are flattering on all hair types, and the wispy bangs add a touch of softness.

- Boho shag with beach waves. This shag haircut is perfect for the boho-chic girl. The layers are long and flowing, and the beach waves give it a relaxed, effortless look.

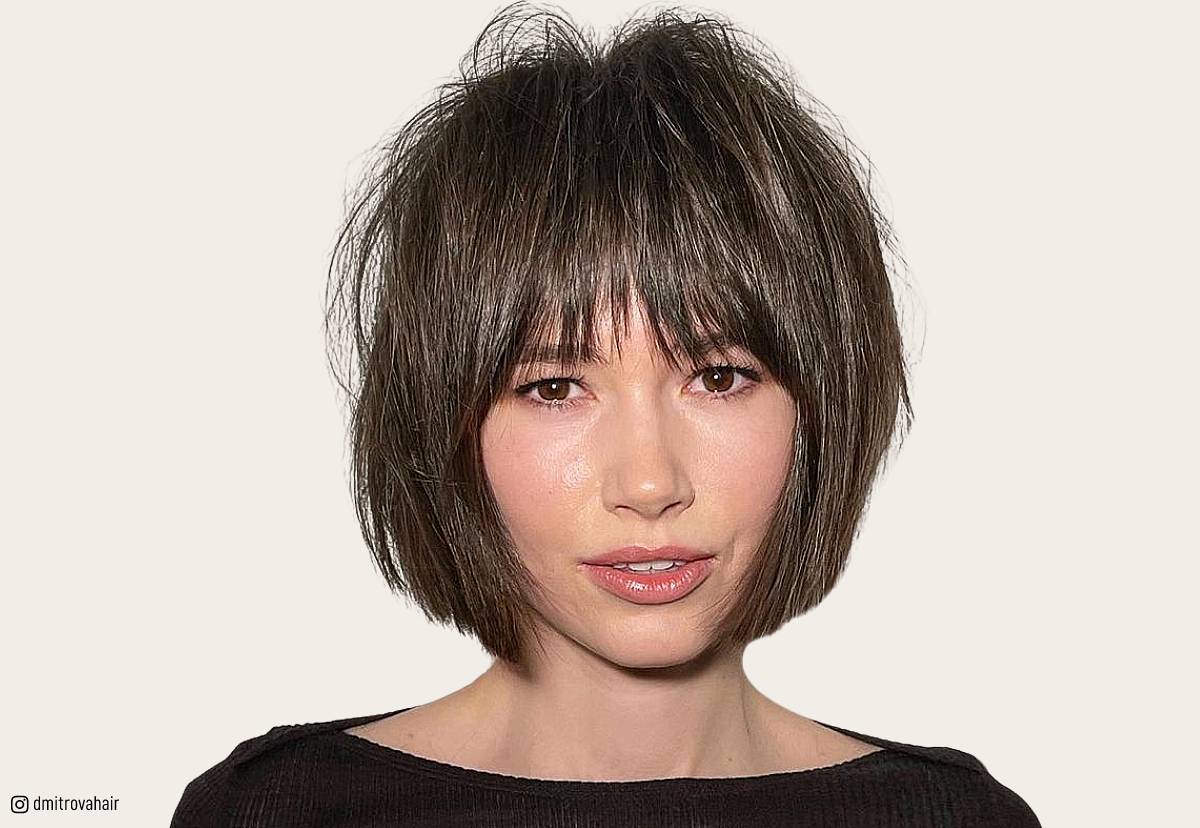
- Cropped shag with blunt bangs. This shag haircut is short and edgy. The blunt bangs add a touch of toughness, while the cropped length is perfect for hot weather.
- Asymmetrical shag with side-swept layers. This shag haircut is unique and eye-catching. The asymmetrical layers add dimension to the haircut, and the side-swept layers frame the face nicely.

- Long shag with curtain bangs and a center part. This shag haircut is classic and elegant. The curtain bangs frame the face nicely, and the center part adds a touch of sophistication.
- Wavy shag with wispy bangs and a side part. This shag haircut is versatile and easy to style. The wavy texture is flattering on all hair types, and the wispy bangs can be swept to the side or worn down.

- Straight shag with blunt bangs and a deep side part. This shag haircut is sleek and sophisticated. The straight layers are flattering on all hair types, and the deep side part adds a touch of drama.

Post a Comment for "How To Diy A Long Shag Haircut In Minutes Or Less"